The
EOS 5D Mark II was not exactly the camera I was hoping for, which was in my dreams somewhat more like a
Nikon D700 less 200g… But ultimately, Canon's compromise perfectly fit the bill with its LiveView and unexpected cropping abilities which, for my needs, largely made up for the too centered autofocus points. The auto ISO mode is a bit restrictive, but after all quite useful in low light. And finally, the simple video feature is a great bonus for "family" type use: I was too often forgetting the 1.4 kg camcorder...
Below, some tips and tricks to get more out of this camera, avoiding dogma.
Focus Recompose
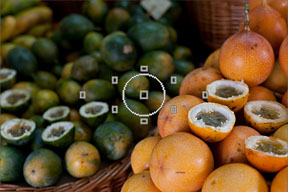
The EOS 5D Mark II autofocus points being too centered, I frequently use the very efficient centre point for focusing (shutter button halfway), further recomposing before fully triggering. The
measured distance error is not really significant until a distance of less than 2 m (6 ft) at f/2 or 1 m (3 ft) at f/4 for a subject at the thirds on a FF sensor. In this case, and to avoid any measurement error, I use a lateral autofocus point while recomposing by rotating the camera around the sensor centre axis.
Rolling your mouse on the image will illustrate such a focusing phase.
In low light, the flash in autofocus assist mode without firing may help a lot for precise focusing.
LiveView Focusing
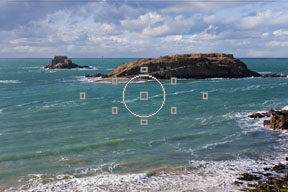
When depth of field is really shallow, or in low light with an off-centre subject, manual focusing in LiveView is extremeley effective. Here is the process I use: rough focus, LiveView, move the Live focusing point on the subject, adjust exposure, x5 or x10 zoom, manual focus precisely and trigger. Without a tripod,
IS helps a lot with longer lenses, but it remains easy with a x5 zoom on the EF 135 L f/2.
Rolling your mouse on this image will zoom up to x10 at the Live focus point.
Intentional Cropping
The EOS 5D Mark II's 21 Mpixels are useful for the rare very large prints, but also mostly for purposeful croppings; for instance squares or panoramics (effective to remove softer ultra wide angle corners).
It also reduces the benefits of zooms, as fixed focals can be cropped and are lighter and faster for better depth of field control. An EF 135 L f/2 image cropped to 6 MPixels leads to a 250 mm equivalent focal length with exceptionnal quality.
With fast moving subjects (animals, sport, eye of a kid, etc.), I shoot in centred AI-Servo. Cropping the point of interest to the thirds still leaves 12 MPixels.
Roll your mouse on this image to crop to an equivalent of 6 MPixels, and clic for a larger view.
Statistical Stabilizer
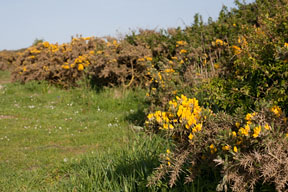
To fully benefit from the EOS 5D Mark II's 21 MPixels, you need to double or triple the old film rule of thumb of 1/focal speed. With a still subject at slow speed, a burst will help reduce motion blur by choosing the best shot (the first image is always blurred because of finger motion). I generally observe a 2 to 3 EV gain with 5 to 9 images bursts. Therefore, I don't miss
IS too much on my prime lenses, even though IS remains very useful to stabilise the viewfinder image or for greater depth of field without a tripod.
This is a 100% crop of the first image at 50 mm and 1/10s. Rolling your mouse will reveal the sharpest of the burst of 9.
sRAW1 vs RAW
The sRAW1 format is in fact very different from RAW (14 bits per pixel
Bayer matrix): it is already
demosaiced and is coded in
YCbCr. Luminosity information is coded with 15 bits and chrominance with 2x15 bits every 4 pixels. Therefore, it is very effective at higher ISO settings where chrominance noise will be smoothed out (very impressive at ISO 6400). I use this format to gain disk or card space and processing time when I will not print above an A3 format or about 16x11 inches (family shots for instance), when cropping is not intended or when several blur causes are cumulated:
- Higher ISO settings,
- Slower exposure speeds,
- Diffraction at smaller apertures,
- Softness of larger apertures on some lenses.
Most of the time, when I'm around ISO 1600, speed or aperture are also critical and the 21 MPixels of the RAW format will not give much more than the 10 MPixels of the sRAW1 format.
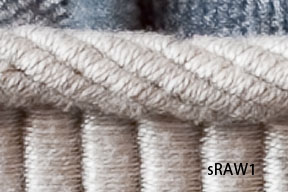
To get an idea of the definition loss associated with the coding format in an ideal situation, roll your mouse on this 100% crop of an sRAW1 detail extrapolated to RAW size to observe the RAW equivalent. Both images were sharpened at best.
Focusing Screens
I use the
Eg-S Precision Focusing Screen for manual focus adjustments at wider apertures (mainly for portraits); occasionally the 17-40 mm f/4 remains usable despite a darker viewfinder.
The Eg-D Grid Focusing Screen is very useful for painless horizontal horizons and vertical architectures.
Roll your mouse on this image to simulate the installation of the Eg-D Grid Focusing Screen.
3D: depth of field
After 4 years in APS-C, I finally recovered depth of field control with the EOS 5D Mark II full frame format. This is especially noticeable with light fast prime lenses like the "normal" 50 mm f/1.4.
A low contrast composition where the subject is lost in the background may become interesting with a shallower depth of field (perspective suggested through sharpness gradations between foreground, subject and background).
Roll your mouse on this 50 mm f/10 image for an f/1.4 version.


